Showing posts with label gluten-free. Show all posts

Wednesday, May 2, 2012

Carrot Cake Cupcakes


Okay. I have to say it. These are AMAZING. It has been a long time since I’ve had carrot cake. So long in fact, that I really had to think about what these should taste like! After several failed attempts, I believe I finally created something divine: Carrot Cake Cupcakes.

What makes this cupcake a rockstar? The shredded coconut, crushed pineapple and almond flour. The coconut adds texture. The pineapple adds texture and moisture. The almond flour adds moisture and is full of protein, making it a nutritious and delicious flour alternative.

I promise, if you make these cupcakes, people will be clueless that they are gluten & dairy-free. ;)


Carrot Cake Cupcakes
by Laura Friendly
start to finish: 50 minutes
makes: 12 cupcakes

  • ½ cup Bob’s Red Mill Gluten-Free All Purpose Baking Flour
  • ½ cup Blanched Almond Flour
  • ½ cup sugar
  • ½ cup coconut palm sugar
  • 1 cup shredded coconut
  • 1 tsp baking soda
  • 1 tsp baking powder
  • 1 tsp xanthan gum
  • 1 tsp cinnamon
  • ½ tsp salt

  • 1 cup shredded carrots, room temperature

  • 8 oz can crushed pineapple
  • 2 large eggs, room temperature
  • ½ cup coconut oil, melted

Preheat oven to 350 degrees F. Line muffin tins with paper liners.

In a large bowl, whisk together the dry ingredients: flours, sugars, shredded coconut, baking soda, baking powder, xanthan gum, cinnamon and salt. Add in shredded carrots, mix until carrots are completely coated and the mixture has become crumbly.

In a separate bowl, whisk together pineapple, eggs and coconut oil. Add mixture into the dry ingredients, and mix until the batter is smooth.

Pour the mixture into the 12 muffin liners, filling only ½ to ¾ full. Bake in the center of a preheated oven, for about 21 minutes, depending on your oven. At the 15 minute mark, rotate the cupcakes 180º. Bake until the edges are golden brown and a toothpick inserted in the center comes out clean.

Cool the pan briefly, then gently pop out the cupcakes and continue cooling on a wire rack.

Once completely cooled, frost the cupcakes and cover in an airtight container.


Soy Cream Cheese Frosting (vegan)
by Laura Friendly
start to finish: 10 minutes
makes enough frosting for 12 cupcakes
  • ¼ cup soy butter, room temperature
  • ¼ cup vegan cream cheese, room temperature
  • 2 ⅓ cups powdered sugar

Place soy butter and vegan cream cheese, into a large mixing bowl, and beat until fluffy (using a hand or stand mixer).

With mixer running slowly, add in powdered sugar, ⅓ cup at a time, and beat until smooth. Scraping down the sides of the mixer as often as necessary.

Use immediately.

note: If the frosting seems too thick, add a little more vegan cream cheese (1 tbsp at at time) until it becomes spreadable. If it’s not thick enough, add in more powdered sugar (1 tbsp at a time) until it’s stiff but still spreadable.


See this recipe on HelloGiggles!

Wednesday, April 18, 2012

Focaccia with Garlic, Olives and Sun-dried Tomatoes


This past weekend, I spent A LOT of time in the kitchen. I worked on a handful of different recipes… trying, tasting, baking, cooking, scheming, creating, burning (it happens), until I finally worked out a few delights to share.

One of these recipes is a yummy Focaccia bread. I wanted to make a bread that would be perfect with pasta, and also delicious to snack on. This recipe is really very simple, but it does require a bit of time to make. I love the combination of roasted garlic, sun-dried tomatoes and olives. These three beauties come together to create bite after bite of deliciousness.


Focaccia with Garlic, Olives and Sun-dried Tomatoes
by Laura Friendly
start to finish: about 3 hours (including 2 hours to allow the dough to rest and rise)


  • 1 cup White Sorghum flour
  • 1 cup Brown Rice flour
  • 1 cup Tapioca flour/starch
  • 1 tbsp active dry yeast (I use Red Star Active Dry Yeast)
  • 1 tbsp salt
  • 1 tbsp xanthan gum

  • 3 eggs, room temperature
  • ¼ cup olive oil
  • 1 tbsp agave nectar
  • 1 cup warm water

  • ⅓ to ½ cup sun-dried tomatoes, (soaked in water or oil, until soft), cut into strips
  • ⅓ cup olives, sliced in half lengthwise
  • 5 garlic cloves, thinly sliced (or 2 heads roasted garlic)
  • olive oil
  • salt and pepper

Lightly coat a Half Size Sheet Pan (12in x 17in rimmed baking sheet) with olive oil, set aside.

In a heavy-duty, stand mixer (with paddle), combine dry ingredients: flours, yeast, salt and xanthan gum. Mix well.

In a separate bowl, mix together wet ingredients: eggs, oil, agave and warm water. With the stand mixer on low, gradually add the wet ingredients into the dry ingredients — ½ cup at a time — until all of the wet ingredients are well incorporated into the dough. note: the dough will be very sticky

Coat your hands with olive oil and transfer the dough onto the baking sheet. Using your hands, gently spread the dough into a thin layer, across the baking sheet. Lightly coat the top of the dough with more olive oil.

Place sun-dried tomatoes, olives and garlic on top of dough, gently pressing them into the dough. Sprinkle dough with salt and pepper.

Loosely cover the baking sheet with foil, plastic or a kitchen towel (not airtight), and allow the dough to rest at room temperature, until it rises slightly, approximately 2 hours.

30 minutes before baking, preheat oven to 450º F. Slide the baking sheet into the center of the oven and bake for about 20 minutes. The focaccia should be lightly browned and firm. Allow to cool for before slicing or eating.


Also see this recipe on HelloGiggles!
Wednesday, April 11, 2012

Quinoa & Kale


What’s the perfect side dish, that you can make ahead of time, refrigerate overnight, reheat the next day, and still tastes great? That was my challenge this weekend. My family was having an Easter cook-out, and I needed to make a dish-to-pass. Something that would travel well and require little tweaking.

I’ve been thinking about a warm, quinoa salad, for sometime now. I cannot say enough great things about quinoa. Not only is it gluten-free, it's also a complete protein, contains all 9 essential amino acids, and is full of calcium. It looks like a grain, cooks like rice, but it has a unique nutty flavor all its own. Plus, it’s fun to say. ;)

This dish is full of good things: quinoa, fresh kale, fresh lemon, onion, capers and a little bacon. Yummy, healthy and flavorful. I hope you LOVE it, as much as I do.


Quinoa & Kale
by Laura Friendly
start to finish: about 25 minutes
makes: about 8 cups

  • 4 cups cooked quinoa (about 1⅓ cups dried quinoa)
  • 4 tbsp olive oil
  • about 20 stems of kale, cleaned, stems removed, chopped (also chop up stems and set aside)
  • 1 large white onion, diced
  • 10 (or more) roasted garlic cloves, minced (or 3 to 5 fresh garlic cloves)
  • 4 pieces cooked gluten & dairy-free bacon, finely chopped
  • 3 tbsp capers

  • ⅓ cup white wine
  • 4 to 6 tbsp fresh lemon juice (or to taste)
  • salt and pepper to taste
  • zest of 1 lemon

Cook quinoa according to instructions. Set aside and allow to cool.

In a large saute pan, over medium-high heat, add olive oil, kale stems, onion, garlic, bacon and capers. Cook for about 5 minutes until onions are soft and transparent. Add in kale leaves, white wine and lemon juice. Mixing continually, cook until kale is slightly wilted, about 5 minutes. Season with salt & pepper.

Remove pan from heat and mix in cooked quinoa, toss well. Season with additional olive oil, lemon juice and salt & pepper (if desired). Before serving, top with freshly grated lemon zest.


See this recipe on HelloGiggles.com

Wednesday, March 28, 2012

Pear, Blueberry, Cucumber, Tomato Fruit Salad


I know, this sounds different… and it is different from your average fruit salad, but it’s good. I first discovered the wonderful blend of pears, cucumbers, tomatoes and avocados, while doing a fruit cleanse (aka: fruit feast) as part of a yoga training. Until that time, it had never occurred to me to mix foods I considered vegetables, with sweet fruit. As I soon discovered, cucumbers, tomatoes and avocados are technically fruit, because they contain seeds. So you see, this works!

This idea, made me rethink what a fruit salad could be. Adding crunchy cucumber, and soft avocado, offer different textures to a fruit salad. Plus they compliment the sweet blueberries and pears.

Great, with or without dressing, this fruit salad is a MUST for summer. Enjoy!


Poppy Seed Dressing
by Laura Friendly
  • 4 tbsp light oil (I used avocado oil)
  • 2 tbsp agave nectar
  • 1 tbsp apple cider vinegar
  • juice & zest of 1 lime
  • ½ tsp poppy seeds
  • ¼ tsp salt
In a small bowl, whisk together oil, agave, vinegar, lime juice, lime zest, poppy seeds and salt. Set aside.


Pear, Blueberry, Cucumber, Tomato Fruit Salad
by Laura Friendly
  • 1 pear, diced
  • 1 english cucumber, sliced or diced
  • 1 cup sweet cherry tomatoes, cut in half lengthwise
  • 1 cup sweet blueberries
  • 1 avocado, diced
In a large bowl, toss together diced pear, cucumber, tomatoes and blueberries. Pour Poppy Seed Dressing over the top and mix well. Refrigerate for about 30 minutes, top with avocado and serve.


Also see this recipe on HelloGiggles!


Thursday, March 8, 2012

Parsley & Cilantro Pesto


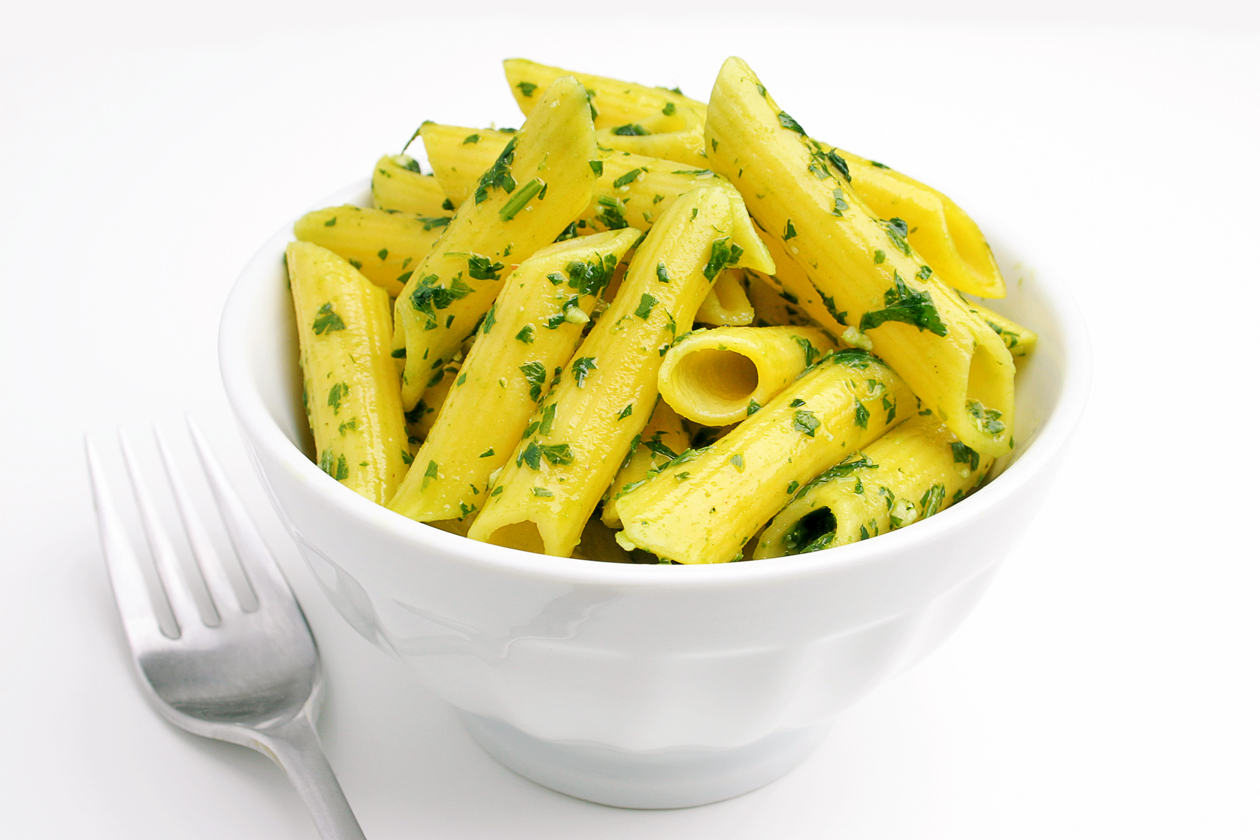
Today’s recipe is super simple but very tasty. Pesto. Parsley & Cilantro Pesto, to be precise.

I make this pesto more often than traditional pesto, because it’s less expensive, and fresh parsley and cilantro are usually available at the grocery store. A traditional pesto uses a combination of fresh basil, garlic, olive oil, pine nuts and cheese. Basil and pine-nuts can both be expensive ingredients, so with this in mind, I created what I affectionately call, cheap pesto. But trust me, this doesn’t taste cheap. It’s FULL of flavor. The combination of lemon, garlic and fresh herbs are divine. I hope you enjoy!


Parsley & Cilantro Pesto
by Laura Friendly
Start to Finish: 10 minutes
makes: about 1 cup

  • 1 extra large bunch flat leaf parsley, washed and stems removed
  • 1 extra large bunch cilantro, washed and stems removed
  • juice of 1 lemon (3 to 4 tbsp)
  • 2 garlic cloves, smashed (or 5 to 6 roasted garlic cloves)
  • dash of red pepper flakes
  • ¼ cup olive oil
  • salt & pepper to taste
Combine parsley, cilantro, lemon juice, garlic and red pepper flakes in a food processor, and pulse until the ingredients are finely chopped. With the machine running, slowly add the olive oil in a steady stream, until it become a smooth paste. Season with salt and pepper to taste. note: if the mixture seems too thick, continue to add olive oil, until it gets to your desired consistency

Toss with warm pasta and dive in!


You can also view this recipe on HelloGiggles!


Thursday, March 1, 2012

Roasted Acorn Squash & Tomatillo Soup


In case you haven’t already noticed… I kind-of have a trend going. Basically, it’s roasted anything and everything. Over the past few weeks, I’ve been re-discovering the amazing flavors of fruits and vegetables, and enhancing them through roasting. There is something beautiful about letting these lovely life-givers, speak for themselves.

Sunday nights have quickly become my ‘roasting’ night. I turn the oven up and throw in everything: peppers, tomatoes, squash, garlic, beets and a random something I haven’t roasted before… this week, green tomatillos.

What is a tomatillo? Tomatillos are related to the gooseberry and are used often in Mexican foods. Green tomatillos tend to be more tart, and are great in salsas and soups.

This soup has a nice savory, spicy combination. The sweetness of the squash, blends with the tangy tomatillos, and is followed up by the heat from the cayenne pepper. You could also use roasted jalapenos in place of the cayenne, if you have a few on hand. I hope you enjoy!


Roasted Acorn Squash & Tomatillo Soup
by Laura Friendly
Start to Finish: 15 minutes (not including roasting time)
makes: about 6 cups
  • flesh of 1 roasted acorn squash, about 2 cups
  • 6 (or more) roasted tomatillos
  • 1 roasted poblano pepper
  • 2 cup coconut milk
  • 1 cup gluten-free tomato juice (or gluten-free vegetable stock would be good too)
  • 2 tsp paprika 
  • 1 tsp sea salt
  • ½ tsp black pepper
  • ½ tsp cumin
  • ½ tsp coriander 
  • ¼ tsp cayenne pepper (adjust to your heat level)
Roughly chop the tomatillos and pepper. Place all ingredients into a blender and puree until smooth. Transfer mixture to a large sauce pan. Warm over medium-heat, for about 10 minutes, stirring frequently. Season with salt & pepper to taste.


How to oven roast vegetables:
  1. Preheat oven to 375ºF.
  2. Using a strong knife, carefully cut the acorn squash in half, lengthwise. Use a spoon to scoop out the seeds. Score the insides of the squash with a sharp knife. Place each half into a baking dish, cut side up. (I like to add about ¼ inch of water into the baking dish to prevent the squash from drying out)
  3. Coat the inside of the squash with olive oil and sprinkle with sea salt.
  4. Bake until tender, about 35 minutes or so. Remove from oven and allow to cool. Scoop out the flesh with a large spoon.
  5. Increase the oven to 425˚F.
  6. Slice tomatillos and pepper in half, lengthwise (removing the seeds from the peppers) and place skin side up in a large oven-safe baking dish (or a 4-sided sheet pan). Do not overlap the vegetables but give them space. Evenly coat the skins of the tomatillos and pepper with olive oil and sprinkle with sea salt.
  7. Bake for 30 minutes or until the skins blacken and blister. Remove from oven and cover the baking dish with aluminum foil. Allow vegetables to cool and then remove all skins.

You can also view this recipe on HelloGiggles!


Thursday, February 23, 2012

Roasted Tomato & Pepper Soup


This past month, as part of my yoga journey, I was asked to look at my eating patterns. This required that I start recording my current diet and examine it. A simple process that showed me how I eat, and where I can make a few positive changes. I found myself asking questions like: How much sugar or processed foods do I consume? Do I know where my food came from and how was it produced? Do I eat when I’m stressed or happy or sad?

What stood out for me? Processed Foods. Even on my gluten & dairy-free diet, I (surprisingly) consume many processed items. With the current demand for GF & DF, many retailers are creating foods that are allergy safe… but that doesn’t mean they are healthy! With this mind-set, I began last week on a quest to create flavorful foods, from scratch.

Today, I’m sharing one of the highlights, Roasted Tomato & Pepper Soup. I’m a HUGE fan of roasting because it brings out the natural sweetness and flavors of the fruits/vegetables. It is one of the easiest ways to make everything yummy. And this soup is no exception to yumminess! It’s creamy and savory, with the perfect balance of heat, to leave your mouth wanting more. Enjoy!


Roasted Tomato & Pepper Soup
by Laura Friendly
Start to Finish: 10 minutes (does not including roasting time)
makes: around 4 cups
  • 3 large roasted tomatoes
  • 1 large roasted green bell pepper
  • 1 roasted poblano pepper
  • 1 roasted jalapeno
  • 4 cloves roasted garlic (or more to taste)
  • 1 cup coconut milk, room temperature
  • 2 tbsp avocado oil (or olive oil)
  • juice from ½ a lime, about 1 tbsp
  • salt & pepper to taste
  • shredded coconut

Roughly chop the tomatoes, peppers and garlic. Place into a blender and puree until smooth. Add in the coconut milk and lime and blend for about a minute. If the soup is cold, transfer mixture to a small sauce pan. Warm over medium-heat, for about 7 minutes, stirring frequently. Season with salt & pepper to taste.

While soup is warming, toast shredded coconut. Over medium heat, warm a small non-stick pan and add in shredded coconut, spreading out evenly. Stir frequently and allow coconut to toast. Once the coconut is just beginning to brown, remove from the heat. Sprinkle over soup before serving.


How to oven roast vegetables:
  1. Preheat the oven to 425˚F.
  2. Slice tomatoes and peppers in half, lengthwise (removing the seeds from the peppers) and place skin side up in a large oven-safe baking dish (or a 4-sided sheet pan). Do not overlap the vegetables but give them space (this may require 2 baking dishes). Evenly coat the skins of the tomatoes and peppers with olive oil and sprinkle with sea salt. note: If you desire more heat, do not remove the seeds from the jalapeño.
  3. Remove skins from the garlic cloves. Create a small bowl with aluminum foil and place the garlic in the center. Drizzle with olive oil, sprinkle with sea salt, and fold over the top of the foil to seal in the garlic. Place foil into the baking dish next to the peppers and tomatoes.
  4. Bake for 30 minutes or until the skins blacken and blister (the garlic should be soft but not burnt). Remove from oven and take out the garlic. Cover the baking dish with aluminum foil. Allow vegetables to cool and then remove all skins.

You can also view this recipe on HelloGiggles!