Hello Foodies!
After a couple of months of hard work, Laura Friendly has a new site!
Check out this link for more gluten & dairy-free delights.
laurafriendly.com
Hope to see you there,
Laura

Saturday, July 28, 2012

Wednesday, July 11, 2012
Vegan Butter Pecan Ice Cream
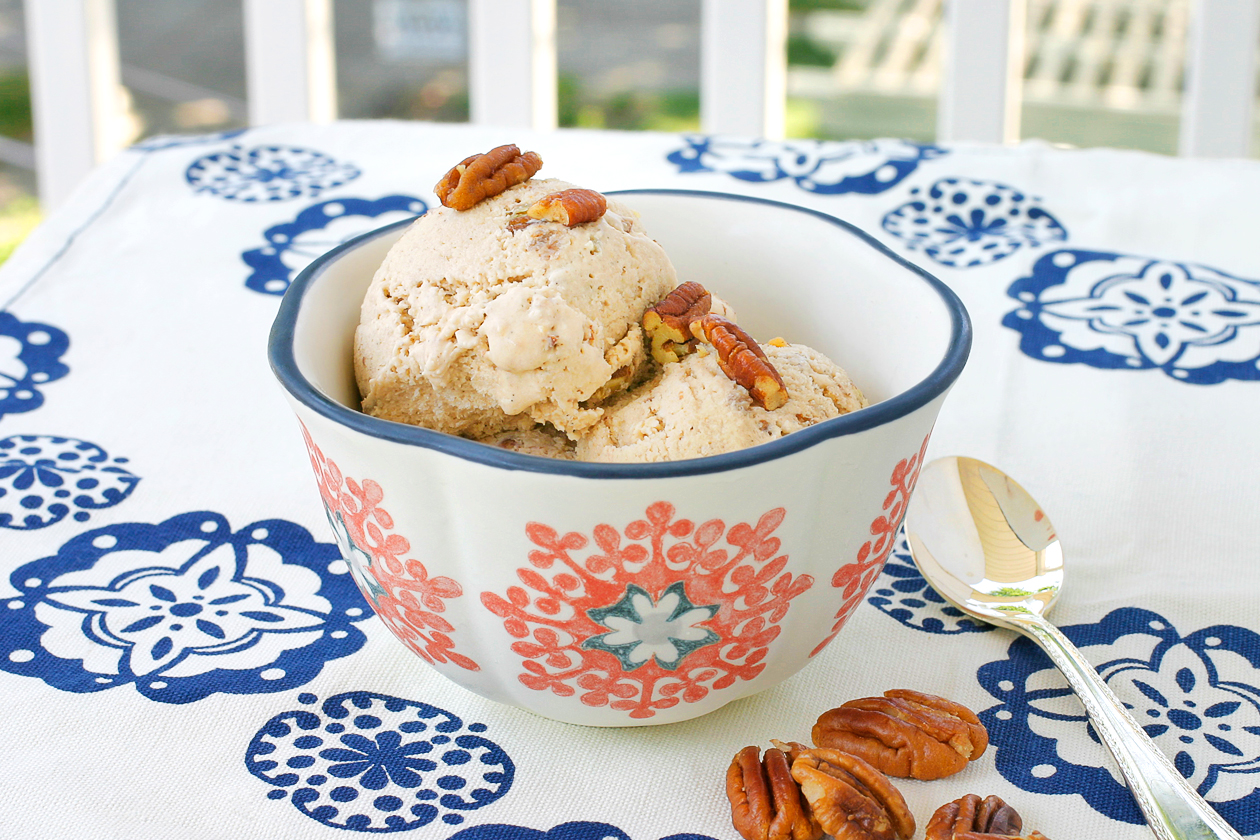
My favorite ice cream flavor is Butter Pecan. I love the rich taste of toasted pecans and vanilla. The past few weekends I’ve been working on a Vegan Butter Pecan Ice Cream. This recipe is very simple but delivers a tasty and delicious treat. I hope you enjoy!
Vegan Butter Pecan Ice Cream
by Laura Friendly
Prep Time: 20 minutes
Chill Time: may vary depending on technique
Ice Cream Maker Time: about 25 minutes
Makes: 1 quart (4 cups)
- 2 cans full fat coconut milk
- ½ cup coconut palm sugar (more or less to taste)
- 1 vanilla bean, split lengthwise
- 2 tbsp vegan butter
- ½ tsp salt
- 1 tbsp vegan butter
- 1 cup pecans, roughly chopped
- 1 tbsp gluten-free vodka, optional
- Melt 1 tbsp of vegan butter into a nonstick saucepan. Cook the pecans over low heat for about 3 minutes, until they are fragrant and lightly browned. Transfer pecans to a paper towel and allow to cool completely.
- Scrape the seeds from the vanilla bean and place into a medium saucepan with coconut milk, sugar, 2 tbsp vegan butter and salt, bring to a boil. Reduce the heat and simmer for about 5 to 10 minutes, stirring occasionally. Remove from heat and chill the mixture completely.
- Once coconut mixture has chilled, transfer to a blender and add ⅓ cup of toasted pecans and vodka. Blend until pecans become very fine. If you want the ice cream to be even smoother, drain mixture through a sieve to remove any large pieces of pecan.
- Pour liquid into your ice cream machine bowl, and churn for about 25 minutes, or according to manufacturer's instructions. The last 5 minutes drop in the remaining pecans. Serve immediately.
- If you’d like a firmer consistency, transfer into a freezer safe container with lid, and freeze for about two hours to thicken.
See more Laura Friendly on HelloGiggles!
Wednesday, July 4, 2012
Citrus Salt

Making a Citrus Salt is a great (and easy) way to put extra zest to good use. The zest of a lemon, lime or orange adds brightness and flavor to many recipes. When you combine a little zest with seasalt, you create a fast way to season any dish. A Citrus Salt allows you to have the flavor of lemons, limes and oranges right at your fingertips for months.
Not only is Citrus Salt a tasty spice to have in your cupboard, it also makes a wonderful housewarming or thank you gift. If you enjoy creating homemade presents, a 3-piece Citrus Salt Combo (lemon, lime and orange) would be perfect for any foodie. The salts will keep for at least 3 months, and depending on how you bottle them they can be quite lovely to look at.
Citrus Salt
by Laura Friendly
prep time: 5 minutes
drying time: a few hours
makes: 1 cup
- 1 cup coarse sea salt
- 2 tbsp citrus zest, more or less to taste (I used Meyer Lemons)
- airtight container, (I prefer glass)
- Combine salt and zest in a food processor. Pulse until the zest is fully mixed into the salt. (you can make the salt as coarse or fine as you like)
- Spread the mixture into a shallow dish and allow to dry out for a few hours. Once dry, transfer Citrus Salt into an airtight container. If the mixture hardened while drying, simply crush it back up.
- Sprinkle over fish, chicken or vegetables and enjoy!
note: store in an airtight container for around 3 months
See more Laura Friendly at HelloGiggles!
Wednesday, June 27, 2012
Breaded Pan Fried Chicken, Brussel Sprouts & Quinoa


Gluten & Dairy-free Breaded Pan Fried Chicken. What on earth could be better? My mother used to make something similar when I was growing up and this is my Laura Friendly version. Served with a side of Pan Fried Brussel Sprouts and a heap of Quinoa… It’s heaven on a plate.
Over the years, I’ve experimented with different ways of breading chicken. Through trial and error (sometimes a lot of error) I have found gluten-free cereals are a great breading choice. This particular batch of Fried Chicken was made with the cereal I had in my cupboard. Gluten-free Corn Flakes. Perfect! It’s really such a versatile dish and can be seasoned anyway that you like. Try adding rosemary, lavender or a little cayenne powder.
This gem has become My Special Man Friend’s favorite dinner. That’s gotta mean something, right?
Breaded Pan Fried Chicken with Brussel Sprouts and Quinoa
by Laura Friendly
start to finish: about 55 minutes total
serves: 4
Breaded Pan Fried Chicken
by Laura Friendly
start to finish: 35 minutes
serves: 4
Over the years, I’ve experimented with different ways of breading chicken. Through trial and error (sometimes a lot of error) I have found gluten-free cereals are a great breading choice. This particular batch of Fried Chicken was made with the cereal I had in my cupboard. Gluten-free Corn Flakes. Perfect! It’s really such a versatile dish and can be seasoned anyway that you like. Try adding rosemary, lavender or a little cayenne powder.
This gem has become My Special Man Friend’s favorite dinner. That’s gotta mean something, right?
Breaded Pan Fried Chicken with Brussel Sprouts and Quinoa
by Laura Friendly
start to finish: about 55 minutes total
serves: 4
Breaded Pan Fried Chicken
by Laura Friendly
start to finish: 35 minutes
serves: 4
- 1 ½ cups dried quinoa
- 1 ½ lbs chicken tenders (or boneless, skinless chicken breasts cut in two, lengthwise)
- 2 ½ cups gluten-free corn flakes
- 2 tsp garlic salt
- 2 tsp onion powder
- 1 ½ tsp black pepper
- 1 tsp thyme
- 1 cup Bob’s Red Mill Gluten-Free All Purpose Baking Flour
- 2 eggs & ¼ cup water, whisked together
- olive oil
Prepare quinoa according to package instructions. (I add 1 tsp of sea salt to the water for extra flavor)
In a food processor, combine corn flakes, garlic salt, onion powder, pepper and thyme. Blend until the cornflakes are crushed into a meal. Set aside.
On a clean counter top, place the chicken between two pieces of waxed paper. Pound the chicken with a meat mallet or pan, until it’s about ¼ inch thick.
Place the GF flour, eggs with water, and cornflake mixture into three separate shallow bowls. Coat both side of the chicken in the flour, shaking off the excess; next, dip chicken into the eggs; finish, by fully coating both sides of the chicken with the cornflake mixture. Set chicken onto a clean plate and continue to bread the remaining tenders. note: do not stack the breaded chicken tenders on top of each other
Heat a large nonstick skillet to medium high and add olive oil. When the olive oil is hot, using tongs, lay the chicken into the pan. Do not overcrowd the pan.
Let the chicken cook for 1 to 2 minutes, until browned, then turn to the other side. Continue to cook for an additional 1 to 2 minutes. Continue to turn the chicken, cooking for an additional minute per side, until cooked through. The chicken is done when the juices run clear, when pierced with a fork.
Transfer the pan fried chicken to a paper towel lined plate and continue to cook the remaining tenders.
Pan Fried Brussel Sprouts
by Laura Friendly
start to finish: 20 minutes
serves: 4
- 20 to 24 brussel sprouts, washed, stems trimmed, cut in half lengthwise
- garlic salt & pepper
- olive oil
- ¼ cup white wine
- juice of 1 lemon
In a large bowl, toss brussel sprouts with olive oil, garlic salt and pepper.
In a non-stick saute pan, over medium heat add sprouts, cut sides down. Drizzle with wine and lemon juice, cover and steam for about 5 minutes, or until sprouts are slightly tender.
Remove the lid, and increase the heat to medium-high & fry until the sprouts begin to lightly brown. Flip over and brown the other side. Season with additional garlic salt & pepper, remove from heat and serve.
See more Laura Friendly on HelloGiggles!
Friday, June 15, 2012
Fruit Salsa with Cinnamon Chips


Fruit Salsa with Cinnamon Chips, is one of my first Laura Friendly desserts. New to the gluten-free world, I was struggling for sweet treats to make at home. As I was noodling around my kitchen, I came to my corn tortillas and wondered if these could be transformed into a dessert? Maybe… with a little bit of cinnamon and sugar… I could make something like Cinnamon and Sugar toast! But what goes with corn tortillas? Salsa. Perhaps, a sweet and spicy fruit salsa would be a good match!
This Fruit Salsa is so delicious, you really could eat this by itself (and I do). I think it tastes even better as the flavors mingle in the refrigerator for a day. The Cinnamon Chips are also delicious but are best served right away. I hope you enjoy!
Fruit Salsa with Cinnamon Chips
by Laura Friendly
start to finish: 30 minutes
serves: 4
Fruit Salsa
In a medium size bowl, combine blueberries, strawberries, plums, nectarines, cherries, honey, lime, jalapeno and cilantro. Mix together well.
Cover and refrigerate while making the Cinnamon Chips.
Cinnamon Chips
Preheat oven to 350º F. Lightly coat a large baking sheet with olive oil and set aside.
Brush tortillas with olive oil and cut into 8 wedges. Arrange tortilla wedges, in a single layer, on the baking sheet. Combine sugar, cinnamon and salt, sprinkle mixture over tortillas.
Bake in the center of the oven until chips are lightly brown and crisp, about 10 minutes. Allow to cool for 5 minutes.
Serve immediately with Fruit Salsa.
Find more Laura Friendly on HelloGiggles!
This Fruit Salsa is so delicious, you really could eat this by itself (and I do). I think it tastes even better as the flavors mingle in the refrigerator for a day. The Cinnamon Chips are also delicious but are best served right away. I hope you enjoy!
Fruit Salsa with Cinnamon Chips
by Laura Friendly
start to finish: 30 minutes
serves: 4
Fruit Salsa
- 1 cup blueberries
- 1 cup strawberries, stems removed and diced
- 1 cup plums, pits removed and diced
- 1 cup nectarines, pits removed and diced
- 1 cup cherries, pits removed, sliced in half
- 2 tbsp honey (or agave nectar to make vegan)
- 1 tbsp fresh lime juice
- 1 tbsp finely chopped jalapeno, optional
- 1 tbsp minced cilantro, optional
In a medium size bowl, combine blueberries, strawberries, plums, nectarines, cherries, honey, lime, jalapeno and cilantro. Mix together well.
Cover and refrigerate while making the Cinnamon Chips.
Cinnamon Chips
- 10 to 12 corn tortillas
- ⅓ cup coconut palm sugar (or regular sugar)
- 1 tsp ground cinnamon
- ½ tsp salt
- olive oil
Preheat oven to 350º F. Lightly coat a large baking sheet with olive oil and set aside.
Brush tortillas with olive oil and cut into 8 wedges. Arrange tortilla wedges, in a single layer, on the baking sheet. Combine sugar, cinnamon and salt, sprinkle mixture over tortillas.
Bake in the center of the oven until chips are lightly brown and crisp, about 10 minutes. Allow to cool for 5 minutes.
Serve immediately with Fruit Salsa.
Find more Laura Friendly on HelloGiggles!
Wednesday, June 13, 2012
Watermelon Lavender Smoothie


A Watermelon Lavender Smoothie may sound a bit strange, but this odd combination is light, floral and delicious.
The key to cooking with Lavender is to start with small amounts. If you add too much, your lovely dish will taste like potpourri. I’ve been working to incorporate lavender into more recipes and this smoothie was a perfect choice. The watermelon is fresh and sweet, and the vanilla yogurt blends well with the floral taste of the lavender.
A wonderful benefit of experimenting with herbs, is the transformation they bring to your food. Something you may have eaten 100 times, suddenly takes on a completely new taste. Try adding a pinch of lavender to your salads, breads or desserts.
Enjoy!
Watermelon Lavender Smoothie
by Laura Friendly
start to finish: 10 minutes
makes: two cups
In a blender, combine watermelon, yogurt, dairy-free milk and lavender. Blend until smooth.
Serve immediately.
Find more Laura Friendly on HelloGiggles!
The key to cooking with Lavender is to start with small amounts. If you add too much, your lovely dish will taste like potpourri. I’ve been working to incorporate lavender into more recipes and this smoothie was a perfect choice. The watermelon is fresh and sweet, and the vanilla yogurt blends well with the floral taste of the lavender.
A wonderful benefit of experimenting with herbs, is the transformation they bring to your food. Something you may have eaten 100 times, suddenly takes on a completely new taste. Try adding a pinch of lavender to your salads, breads or desserts.
Enjoy!
Watermelon Lavender Smoothie
by Laura Friendly
start to finish: 10 minutes
makes: two cups
- 2 cups watermelon, rind removed, cut into 1 inch cubes
- ½ cup dairy-free vanilla yogurt (I used soy yogurt)
- ¼ cup unsweetened dairy-free milk (I used almond milk)
- ⅛ tsp food grade dried lavender, finely ground
In a blender, combine watermelon, yogurt, dairy-free milk and lavender. Blend until smooth.
Serve immediately.
Find more Laura Friendly on HelloGiggles!
Wednesday, June 6, 2012
Almond Joy No-Bake Cookies
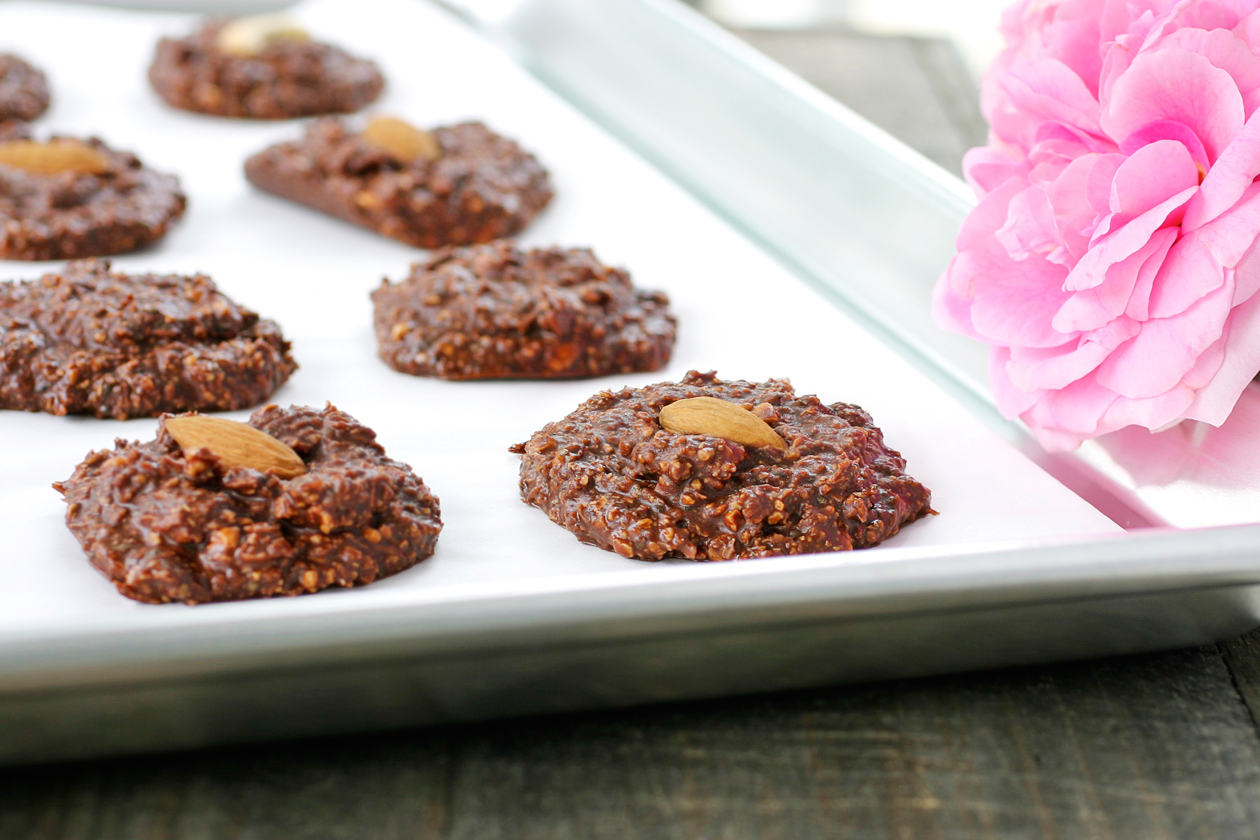


Do you remember the taste of Almond Joy or Mounds candy bars? I use to love them. This cookie is in honor of those delicious treats. Almond Joy No-Bake Cookies. Over the past few weeks, by request of my Aunts, I have been playing around with desserts that use more natural sugars — honey, maple syrup and agave nectar, for example.
To be honest, I’ve been working to eliminate most refined sugars from my diet, so this request did not seem too extreme. It’s amazing to realize how sweet fruit can taste, after limiting sugar for only a week! But even on a low sugar diet, I still require delicious treats. And with the heat of summer fresh in my mind, a cookie that requires little, to no baking, seemed like the way to go.
These cookies have a rich dark chocolate flavor, that works perfectly with the shredded coconut. It’s this combination, dark chocolate and coconut, that takes my mind into Almond Joy Bliss.
You can customize the sweetness of these delights, by adding more or less honey. Or, if honey isn’t your style, agave nectar is a great option. To make these a healthier treat, I’ve added a few tablespoons of Chia seeds [my new favorite superfood, that’s rich in fiber and omega-3 fatty acids]. You can also try adding a bit of fresh ginger, vanilla or nutmeg. Enjoy!
Almond Joy No-Bake Cookies
by Laura Friendly
prep time: 10 minutes
refrigeration time: 30 minutes
makes: 24 cookies
- 5 oz dairy-free, dark baking chocolate (about 1 cup), roughly chopped
- ½ cup honey (more or less to taste)
- ⅓ cup coconut oil
- 1 tsp freshly grated ginger, optional
- ½ tsp salt
- 1 ½ cups shredded coconut
- 1 ½ cups raw cashews, ground into a fine meal or flour
- 2 tbsp chia seeds, optional
- whole almonds or cashews, optional
In a small saucepan, combine chocolate, honey, coconut oil, ginger and salt. Over low heat, mix continually, until the chocolate is completely melted and all ingredients are well combined.
In a medium-sized mixing bowl, combine melted chocolate, shredded coconut, cashew meal and chia seeds. Mix together well.
On a parchment lined, baking sheet, spoon mixture into little mounds (note: the cookies can be placed close together, because they will not spread out). Top with almonds or cashews, if desired. Transfer the baking sheet into the refrigerator, and allow the cookies to set for 30 minutes. Once the cookies have hardened, transfer to an airtight container, and store in the refrigerator for up to 1 week. Serve cold.
See more Laura Friendly on HelloGiggles!
Wednesday, May 30, 2012
Vegan Spicy Chocolate Ice Cream

Sweet and spicy. One of the great flavor combinations. This Vegan Spicy Chocolate Ice Cream is just that.
I’ve been overdue for a chocolate dessert… but I wanted it to be memorable. I love how the flavor and intensity of chocolate can be enhanced by combining it with something spicy. For this ice cream, I was looking to make something refreshing… but that also had a kick. Using cayenne powder added the right amount of heat, that kind-of sneaks up on you… but in a very pleasant way.
If you aren’t a fan of spicy, you can leave out the cayenne, but I do recommend giving it a try. The first bite is cool and delicious and then you slowly start feeling the heat. It’s lovely. I hope you enjoy!
Vegan Spicy Chocolate Ice Cream
by Laura Friendly
Prep Time: 10 minutes
Ice Cream Maker Time: Approximately 25-30 minutes
makes: about 5 cups (1 ¼ quarts)
I’ve been overdue for a chocolate dessert… but I wanted it to be memorable. I love how the flavor and intensity of chocolate can be enhanced by combining it with something spicy. For this ice cream, I was looking to make something refreshing… but that also had a kick. Using cayenne powder added the right amount of heat, that kind-of sneaks up on you… but in a very pleasant way.
If you aren’t a fan of spicy, you can leave out the cayenne, but I do recommend giving it a try. The first bite is cool and delicious and then you slowly start feeling the heat. It’s lovely. I hope you enjoy!
Vegan Spicy Chocolate Ice Cream
by Laura Friendly
Prep Time: 10 minutes
Ice Cream Maker Time: Approximately 25-30 minutes
makes: about 5 cups (1 ¼ quarts)
- 1 vanilla bean, split lengthwise
- 2 13.5 oz. cans of coconut milk (full fat)
- ½ cup agave nectar
- 3 tbsp high quality cocoa powder
- ½ tsp salt
- ⅛ tsp cayenne powder (I like it a bit spicier so I used ¼ tsp)
- 2 tbsp gluten-free vodka
Scrape the seeds from the vanilla bean and place into a blender with the coconut milk, agave, cocoa powder, salt and cayenne pepper. Blend well, about 1 minute. Add in the vodka and mix for about 10 seconds.
Pour liquid into your ice cream machine bowl and churn for about 20-25 minutes or according to manufacturer's instructions. Serve immediately.
If you’d like a firmer consistency, transfer into a freezer safe container with lid, and freeze for about two hours to thicken. Before serving, allow to thaw for about 15 minutes.
See more Laura Friendly on HelloGiggles!
Wednesday, May 23, 2012
Vegan Coconut Green Tea Ice Cream


I love it when you stumble upon something interesting and delicious. Earlier this year, while perusing the shelves at Horrocks, I found an interesting little can-good called Coco Lopez, Real Cream of Coconut. As many of you may have discovered, I heart Coconut. Coconut milk, coconut oil, shredded coconut or coconut water… doesn’t matter, I’m in. So, I naturally needed to find out more about this Real Cream of Coconut.
As it turns out, this lovely product is used to create the delicious Pina Colada! Intriguing… After a little sleuthing (contacting the manufacturer), I was delighted to find out that this product is both gluten & dairy-free.
No, I did not run home and create the ultimate Pina Colada. Instead, I ran home and made ice cream. I’ve been thinking about making a Coconut Green Tea Ice Cream and after tasting the intense flavor in this can, I knew it would be perfect. Real Cream of Coconut is very different from coconut milk. The consistency is much thicker, kind-of like syrup, it’s insanely sweet and the coconut flavor is off-the-charts. Yum.
If you really enjoy the strong flavor of coconut, this is perfect. The lime brings a little tang that sings of summer, and the green tea is subtle, but it creates a beautiful color. I hope you enjoy!
Vegan Coconut Green Tea Ice Cream
by Laura Friendly
prep time: 10 minutes
Ice Cream Maker Time: Approximately 30 minutes
makes: about 5 cups (1 ¼ quarts)
As it turns out, this lovely product is used to create the delicious Pina Colada! Intriguing… After a little sleuthing (contacting the manufacturer), I was delighted to find out that this product is both gluten & dairy-free.
No, I did not run home and create the ultimate Pina Colada. Instead, I ran home and made ice cream. I’ve been thinking about making a Coconut Green Tea Ice Cream and after tasting the intense flavor in this can, I knew it would be perfect. Real Cream of Coconut is very different from coconut milk. The consistency is much thicker, kind-of like syrup, it’s insanely sweet and the coconut flavor is off-the-charts. Yum.
If you really enjoy the strong flavor of coconut, this is perfect. The lime brings a little tang that sings of summer, and the green tea is subtle, but it creates a beautiful color. I hope you enjoy!
Vegan Coconut Green Tea Ice Cream
by Laura Friendly
prep time: 10 minutes
Ice Cream Maker Time: Approximately 30 minutes
makes: about 5 cups (1 ¼ quarts)
- 2 13.5 oz. cans coconut milk (full fat)
- 1 8.5 oz can Real Cream of Coconut (I used Coco Lopez)
- 3 to 4 tsp unsweetened matcha green tea powder
- juice of 1 lime, about 2 tbsp
- 2 tbsp gluten-free white rum
Place all ingredients into a blender and blend on high for about 1 minute.
Pour liquid into your ice cream machine bowl, and churn for about 30 minutes, or according to manufacturer's instructions. Serve immediately.
If you’d like a firmer consistency, transfer into a freezer safe container with lid, and freeze for about two hours to thicken.
Enjoy!
Find more Laura Friendly at HelloGiggles!
Wednesday, May 16, 2012
Watermelon Cucumber Cooler

Do you like watermelon? I love it. There is nothing better than a fresh slice of this delicious fruit, especially on a hot summer day. And what might be even better? A Watermelon Cucumber Cooler! This is a wonderful combination of watermelon, cucumber, mint, lime and vodka (optional of course). The watermelon and cucumber are clean and fresh, but it’s the mint that adds the special touch to this drink.
Cool and delicious, the perfect cocktail for any 80º F day.
Watermelon Cucumber Cooler
by Laura Friendly
start to finish: 15 minutes
serves: 2 (makes about 2 cups)
Cool and delicious, the perfect cocktail for any 80º F day.
Watermelon Cucumber Cooler
by Laura Friendly
start to finish: 15 minutes
serves: 2 (makes about 2 cups)
- 4 cups seedless watermelon, rind removed, cubed
- ½ cup seedless cucumber, skin removed, cubed
- 1 cup ice
- 2 tbsp agave nectar
- juice of 1 lime (about 2 tbsp)
- 2 fresh mint leaves, finely chopped
- 2 shots of vodka, optional
In a blender combine watermelon, cucumber and ice. Cover and blend until nearly smooth. Add in agave, lime juice and mint, blend well.
Strain mixture through a fine-mesh into a small bowl or pitcher, pressing out juice. Discard solids.
Stir in vodka, if desired, and serve immediately over ice. Garnish with fresh mint.
Wednesday, May 9, 2012
Thai Peanut Butter Sauce (vegan & gluten-free)


The weather in Michigan is always unpredictable and last week was no exception. Our temperatures soared from a chilly 32º F up to a humid 81ºF. The extreme heat felt amazing, and I found myself playing around with fast and easy treats to make on a hot summer day.
Today, I’m sharing my Vegan & Gluten-free Thai Peanut Butter Sauce. This sauce is delicious (if I do say so myself) and very versatile. Use it as the perfect dip for Spring Rolls and cut-up veggies, or use it as a sauce to make a delightful Pad Thai.
Thai Peanut Butter Sauce (vegan & gluten-free)
by Laura Friendly
start to finish: 10 minutes
makes: 3 cups
Today, I’m sharing my Vegan & Gluten-free Thai Peanut Butter Sauce. This sauce is delicious (if I do say so myself) and very versatile. Use it as the perfect dip for Spring Rolls and cut-up veggies, or use it as a sauce to make a delightful Pad Thai.
Thai Peanut Butter Sauce (vegan & gluten-free)
by Laura Friendly
start to finish: 10 minutes
makes: 3 cups
- 1½ cups creamy peanut butter
- ¾ cup unsweetened coconut milk
- ½ cup agave nectar
- ¼ cup gluten-free soy sauce
- 2 tbsp gluten-free sriracha
- 5 roasted garlic cloves (or to taste)
- juice of 1 lime (around 2 tbsp)
- fresh ginger, grated
- freshly chopped cilantro and peanuts, optional
In a small bowl, whisk together the peanut butter, coconut milk, agave, soy sauce, sriracha, garlic, lime juice and ginger. Blend until the sauce is nice and creamy.
Before serving, top with fresh cilantro and peanuts.
note: this sauce can be refrigerated in an airtight container, for up to one week
See this recipe on HelloGiggles!
Wednesday, May 2, 2012
Carrot Cake Cupcakes


Okay. I have to say it. These are AMAZING. It has been a long time since I’ve had carrot cake. So long in fact, that I really had to think about what these should taste like! After several failed attempts, I believe I finally created something divine: Carrot Cake Cupcakes.
What makes this cupcake a rockstar? The shredded coconut, crushed pineapple and almond flour. The coconut adds texture. The pineapple adds texture and moisture. The almond flour adds moisture and is full of protein, making it a nutritious and delicious flour alternative.
I promise, if you make these cupcakes, people will be clueless that they are gluten & dairy-free. ;)
Carrot Cake Cupcakes
by Laura Friendly
start to finish: 50 minutes
makes: 12 cupcakes
Preheat oven to 350 degrees F. Line muffin tins with paper liners.
In a large bowl, whisk together the dry ingredients: flours, sugars, shredded coconut, baking soda, baking powder, xanthan gum, cinnamon and salt. Add in shredded carrots, mix until carrots are completely coated and the mixture has become crumbly.
In a separate bowl, whisk together pineapple, eggs and coconut oil. Add mixture into the dry ingredients, and mix until the batter is smooth.
Pour the mixture into the 12 muffin liners, filling only ½ to ¾ full. Bake in the center of a preheated oven, for about 21 minutes, depending on your oven. At the 15 minute mark, rotate the cupcakes 180º. Bake until the edges are golden brown and a toothpick inserted in the center comes out clean.
Cool the pan briefly, then gently pop out the cupcakes and continue cooling on a wire rack.
Once completely cooled, frost the cupcakes and cover in an airtight container.
Soy Cream Cheese Frosting (vegan)
by Laura Friendly
start to finish: 10 minutes
makes enough frosting for 12 cupcakes
Place soy butter and vegan cream cheese, into a large mixing bowl, and beat until fluffy (using a hand or stand mixer).
With mixer running slowly, add in powdered sugar, ⅓ cup at a time, and beat until smooth. Scraping down the sides of the mixer as often as necessary.
What makes this cupcake a rockstar? The shredded coconut, crushed pineapple and almond flour. The coconut adds texture. The pineapple adds texture and moisture. The almond flour adds moisture and is full of protein, making it a nutritious and delicious flour alternative.
I promise, if you make these cupcakes, people will be clueless that they are gluten & dairy-free. ;)
Carrot Cake Cupcakes
by Laura Friendly
start to finish: 50 minutes
makes: 12 cupcakes
- ½ cup Bob’s Red Mill Gluten-Free All Purpose Baking Flour
- ½ cup Blanched Almond Flour
- ½ cup sugar
- ½ cup coconut palm sugar
- 1 cup shredded coconut
- 1 tsp baking soda
- 1 tsp baking powder
- 1 tsp xanthan gum
- 1 tsp cinnamon
- ½ tsp salt
- 1 cup shredded carrots, room temperature
- 8 oz can crushed pineapple
- 2 large eggs, room temperature
- ½ cup coconut oil, melted
Preheat oven to 350 degrees F. Line muffin tins with paper liners.
In a large bowl, whisk together the dry ingredients: flours, sugars, shredded coconut, baking soda, baking powder, xanthan gum, cinnamon and salt. Add in shredded carrots, mix until carrots are completely coated and the mixture has become crumbly.
In a separate bowl, whisk together pineapple, eggs and coconut oil. Add mixture into the dry ingredients, and mix until the batter is smooth.
Pour the mixture into the 12 muffin liners, filling only ½ to ¾ full. Bake in the center of a preheated oven, for about 21 minutes, depending on your oven. At the 15 minute mark, rotate the cupcakes 180º. Bake until the edges are golden brown and a toothpick inserted in the center comes out clean.
Cool the pan briefly, then gently pop out the cupcakes and continue cooling on a wire rack.
Once completely cooled, frost the cupcakes and cover in an airtight container.
Soy Cream Cheese Frosting (vegan)
by Laura Friendly
start to finish: 10 minutes
makes enough frosting for 12 cupcakes
- ¼ cup soy butter, room temperature
- ¼ cup vegan cream cheese, room temperature
- 2 ⅓ cups powdered sugar
Place soy butter and vegan cream cheese, into a large mixing bowl, and beat until fluffy (using a hand or stand mixer).
With mixer running slowly, add in powdered sugar, ⅓ cup at a time, and beat until smooth. Scraping down the sides of the mixer as often as necessary.
Use immediately.
note: If the frosting seems too thick, add a little more vegan cream cheese (1 tbsp at at time) until it becomes spreadable. If it’s not thick enough, add in more powdered sugar (1 tbsp at a time) until it’s stiff but still spreadable.
See this recipe on HelloGiggles!
Subscribe to:
Posts (Atom)